We created this guide to ensure you can easily have an idea on how to install our preset smoothly without surprises, if you haven’t got the chance to get your pack yet you can always get your Lightroom mobile presets here. Lightroom is the little brother of photoshop specialized in the photography editing. This app allows you to enhance your photos without complex editing or drastic transformations. Now there are different versions and options to use Lightroom from your phone to your computer and today we are going to focus on how to install Lightroom presets on the free mobile app.
We created our presets to simplify your editing and save you time while taking advantage or our full experience on editing photos. Weather you are a professional or not you deserve to have beautiful pictures.
INSTALLING LIGHTROOM PRESETS
Getting the pro version of the app gives you the advantage to install your presets very quickly from your desktop software and have it synchronize on all your connected devices / mobile / tablet. Let’s get on the steps to install your presets ! The whole process takes only a few seconds
STEP 1. GET THE SOFTWARE ON YOUR DESKTOP DEVICE.
Download Lightroom CC from your creative cloud and open it. Be careful not to mistake it with Lightroom Classic for desktop, the software we want has a turquoise color and rounded corners
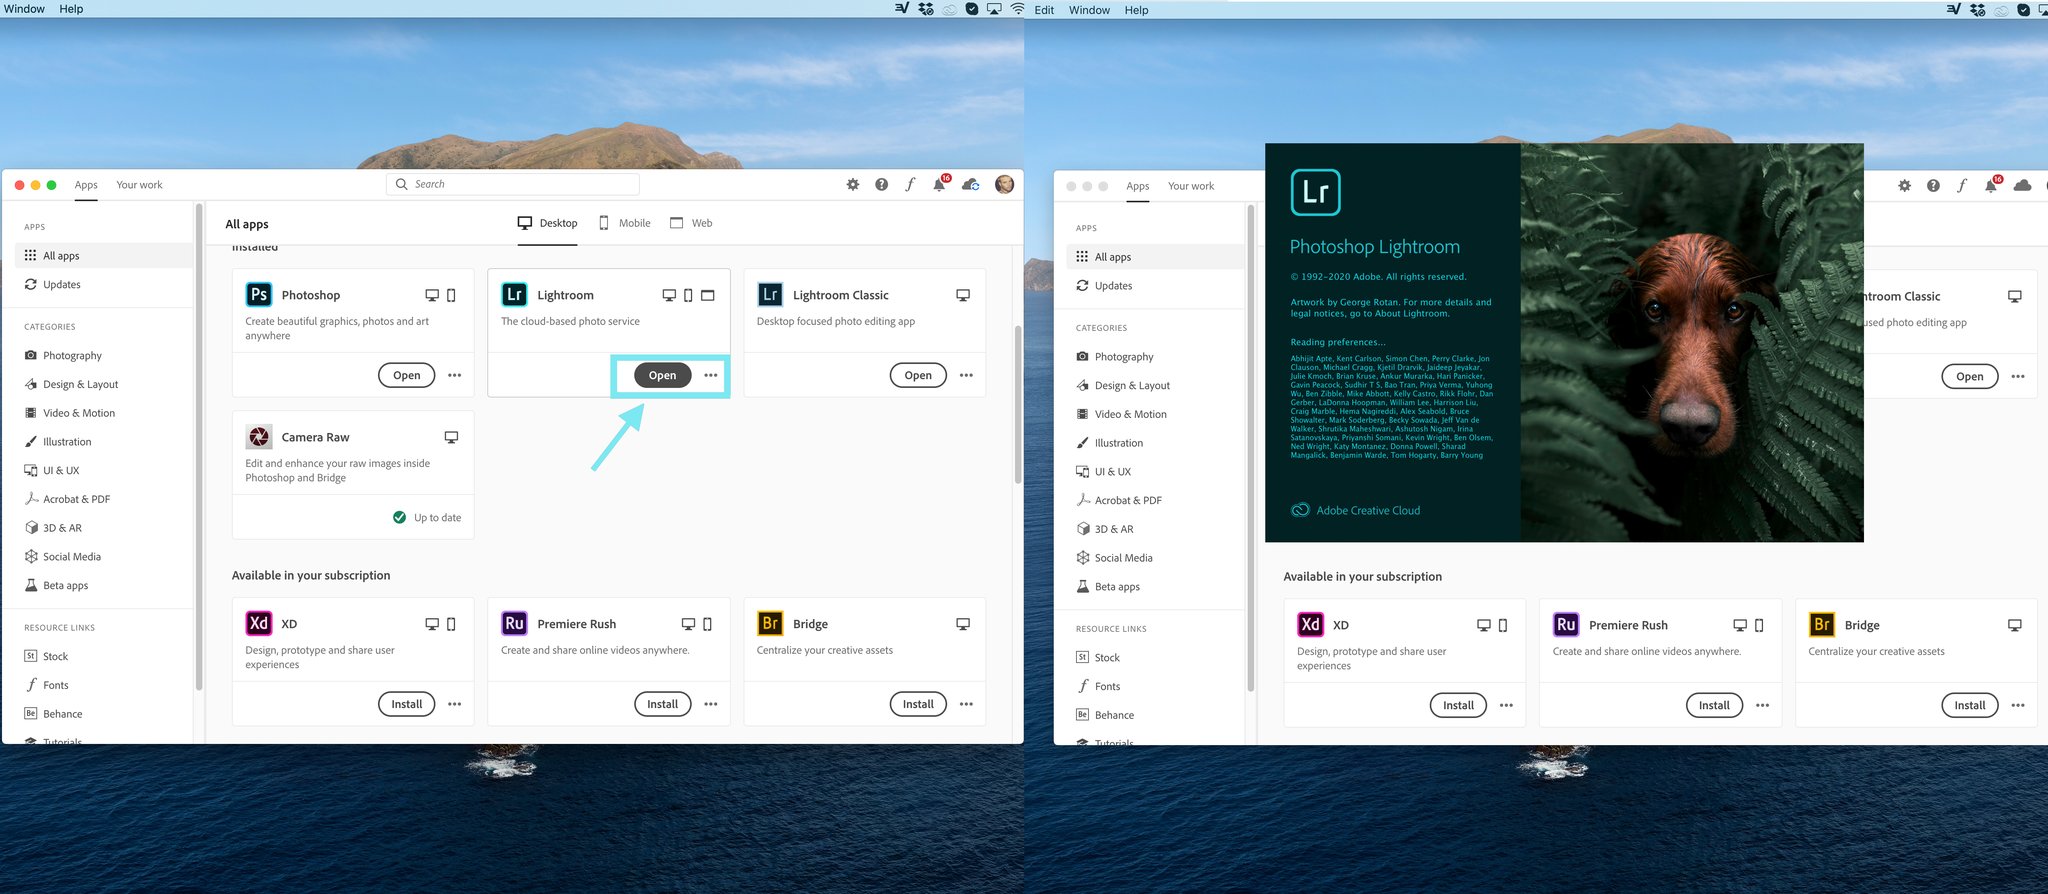
STEP 2. IMPORT YOUR PRESETS IN THE SOFTWARE
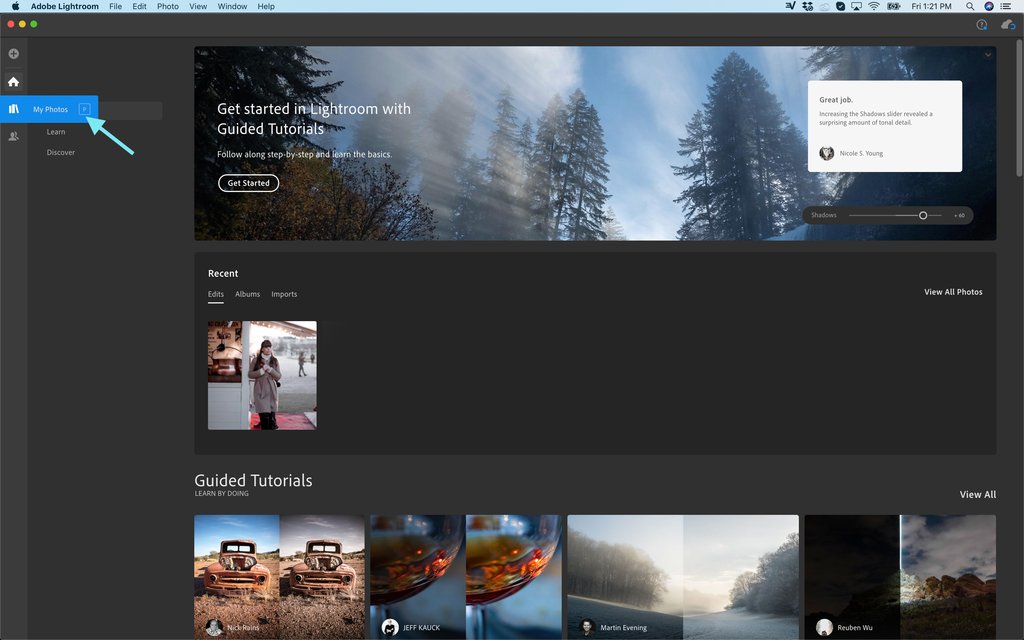
Open the library / the photo section for an easy access and then follow these steps :
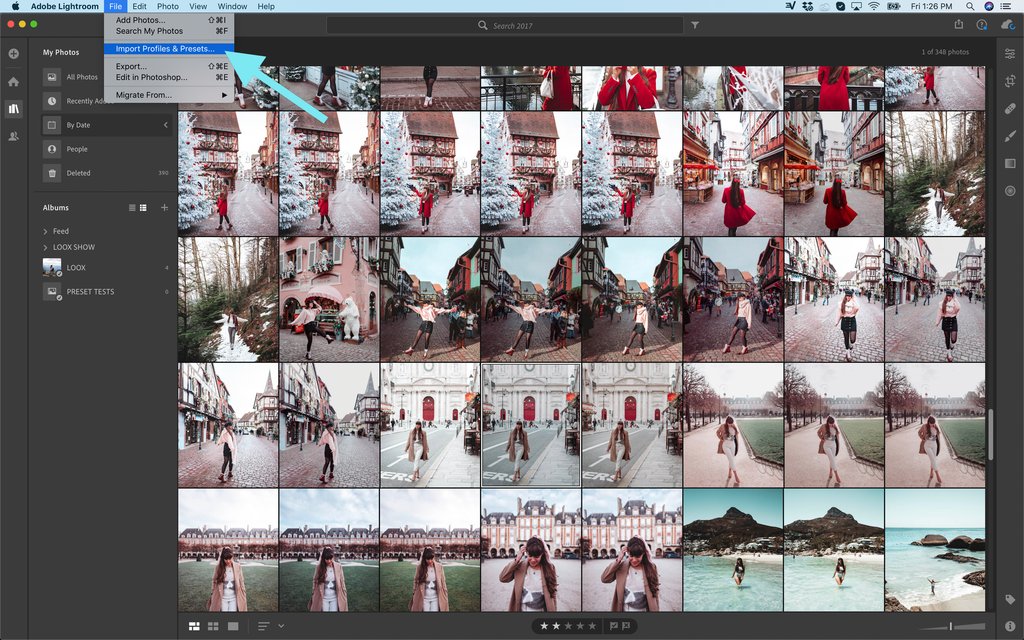
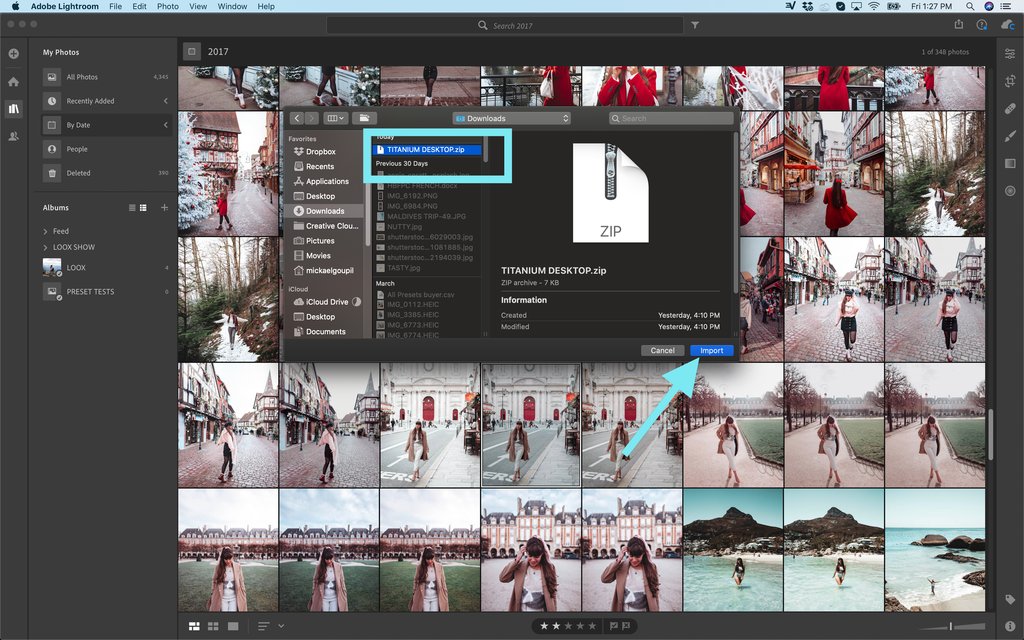
- In the top menu select “File”
- Choose “import profiles and presets”
- Select the Zip file containing your presets (or the presets themselves)
- Import
STEP 3. FIND YOUR PRESETS
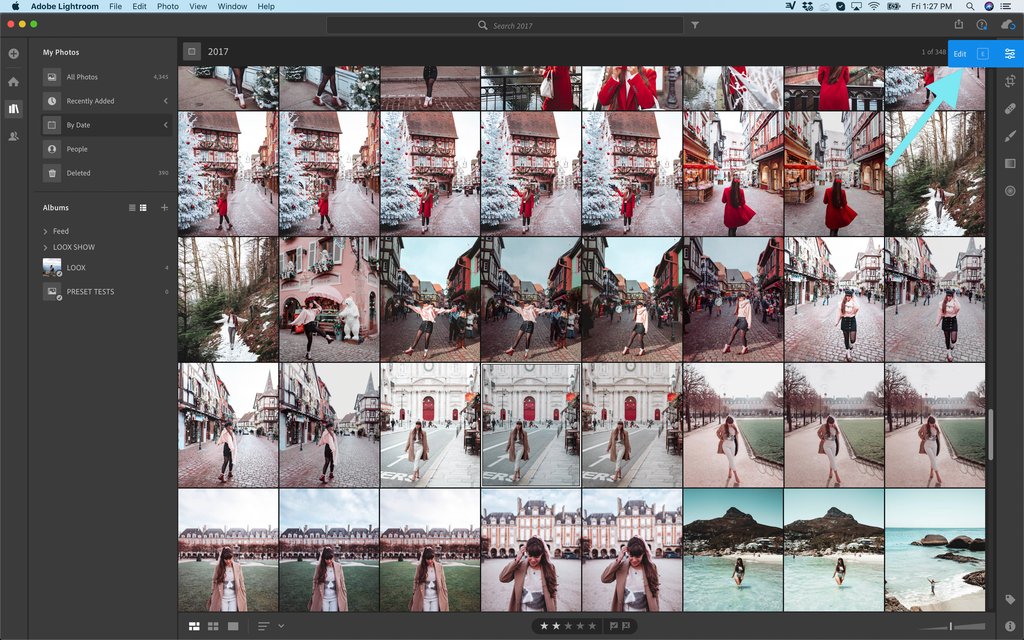
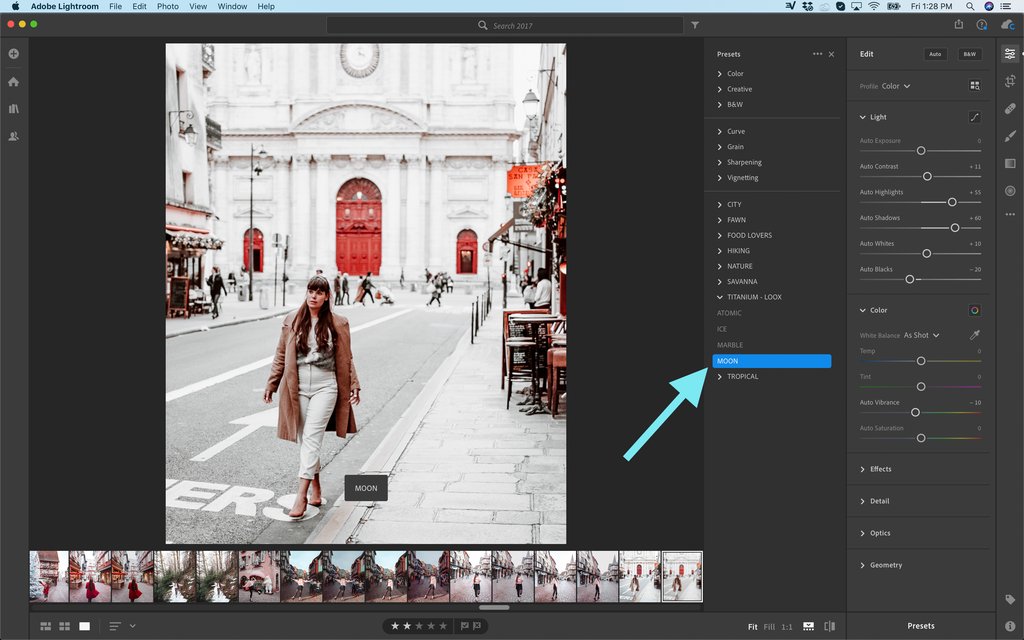
- Select a photo to edit
- Choose the edit tool in the option column on the right side
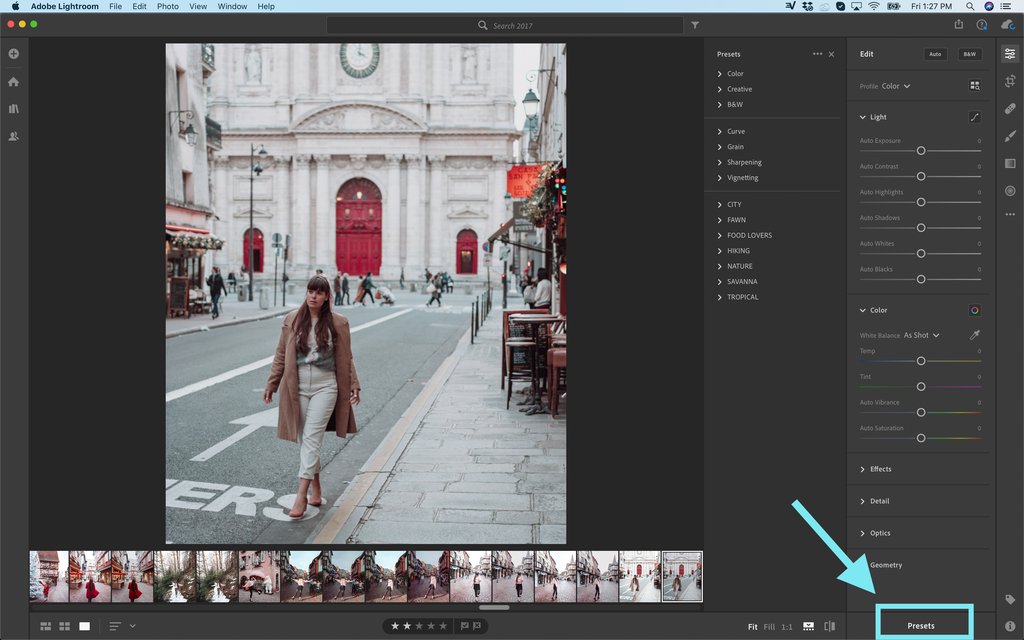
- At the bottom of the editing column choose “Presets”
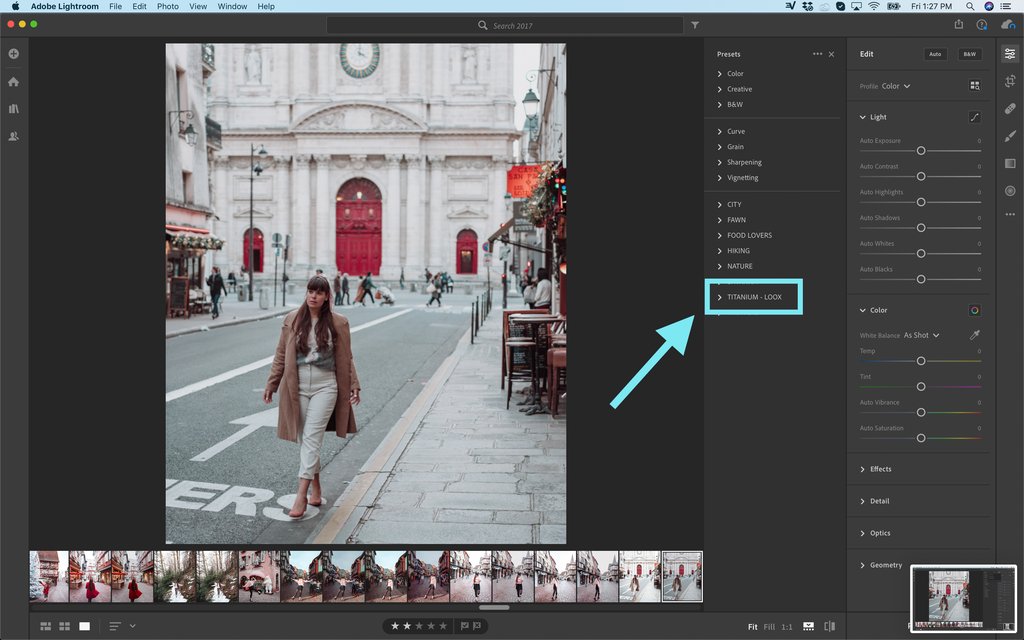
- Find your presets in the list
- Click on it to apply
YOUR PRESETS ARE NOT APPEARING ?
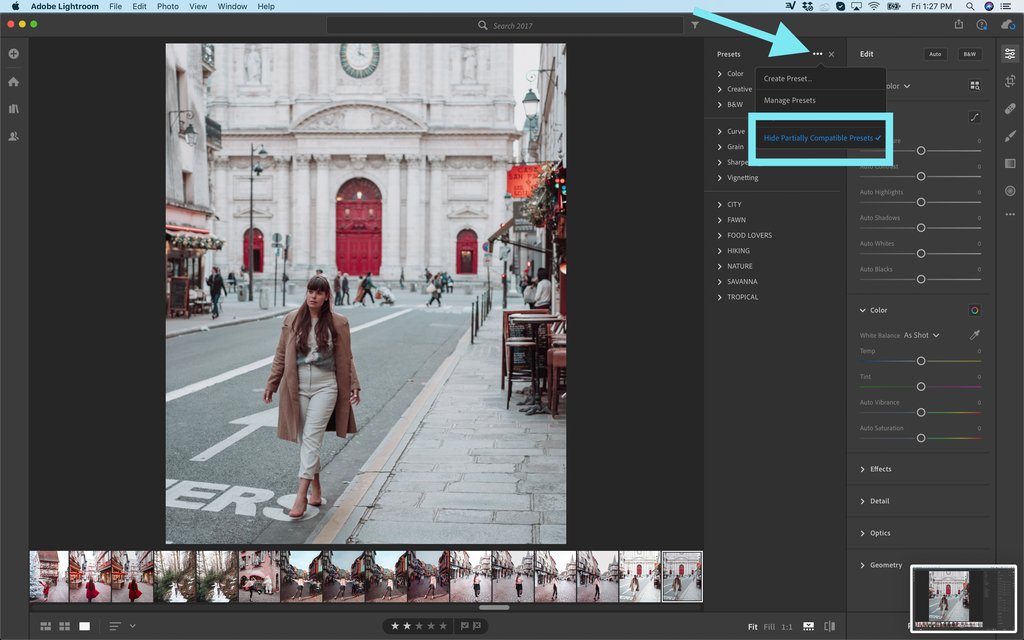
- In the preset section click on the top 3 little dots
- Disable the function “Hide partially compatible presets”
- Your preset group will show up
STEP 4. FIND YOUR PRESETS ON MOBILE
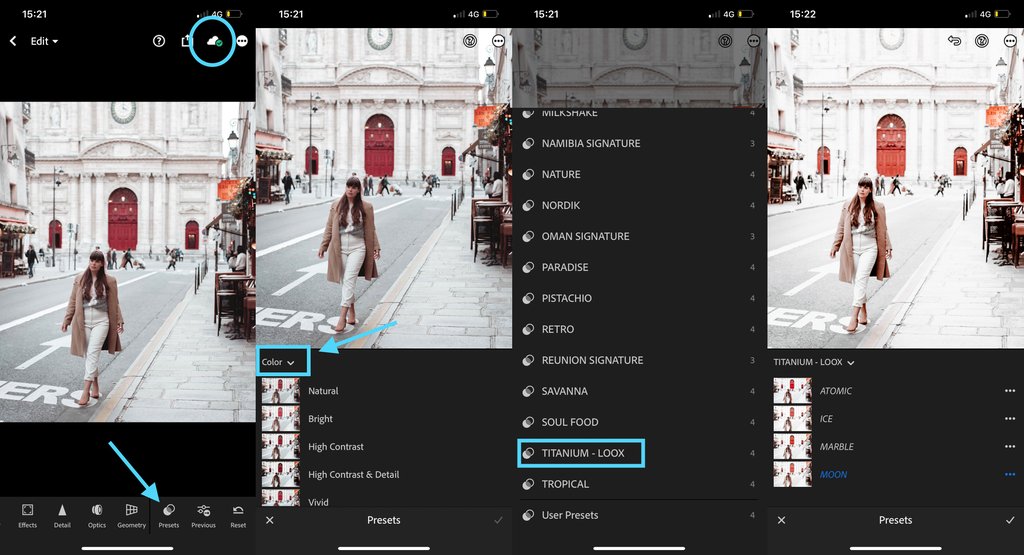
- Open your app
- Check that you are logged in with the same Adobe account as on desktop
- Make sure you are connected to internet, a slow connection might take time to synchronize them. Being on the same wifi as the computer helps the transfer to the app
- Choose a photo to edit
- Open the preset tool
- Open the preset group section by clicking on “color”
- Find your presets in the list
You can now play with them and boost your photos ! You can create as many looks as you need and the editing possibilities are limitless. I love using them to play around with my instagram feed and create new looks every now and then. You can browse all the preset options we created to help you achieve your goals For more tips and tricks follow me on Instagram : https://www.instagram.com/real.messia/ Share your creations and tag #messiapreset to be featured.
